Want to launch your website with WordPress?
Good news:
👉 Hostinger makes WordPress installation extremely easy.
You don’t need:
- Coding skills
- Technical knowledge
- Web development experience
In this tutorial, I’ll show you exactly how to install WordPress on Hostinger step-by-step.

🚀 Why Use WordPress with Hostinger?
Hostinger is popular for WordPress because it offers:
✅ One-click WordPress installation
✅ Beginner-friendly dashboard
✅ Fast hosting performance
✅ Affordable pricing
✅ Free SSL certificate
🔥 Get Hostinger Hosting 20% discount
📝 Step 1: Buy a Hostinger Hosting Plan
Before installing WordPress, you need hosting.
Recommended Plan:
Hostinger Premium Web Hosting
Best for:
- Bloggers
- Beginners
- Affiliate marketers
💰 Claim Hostinger Deal

🌐 Step 2: Log Into Your Hostinger Account
After purchase:
- Open Hostinger
- Login to dashboard
- Go to Hosting section
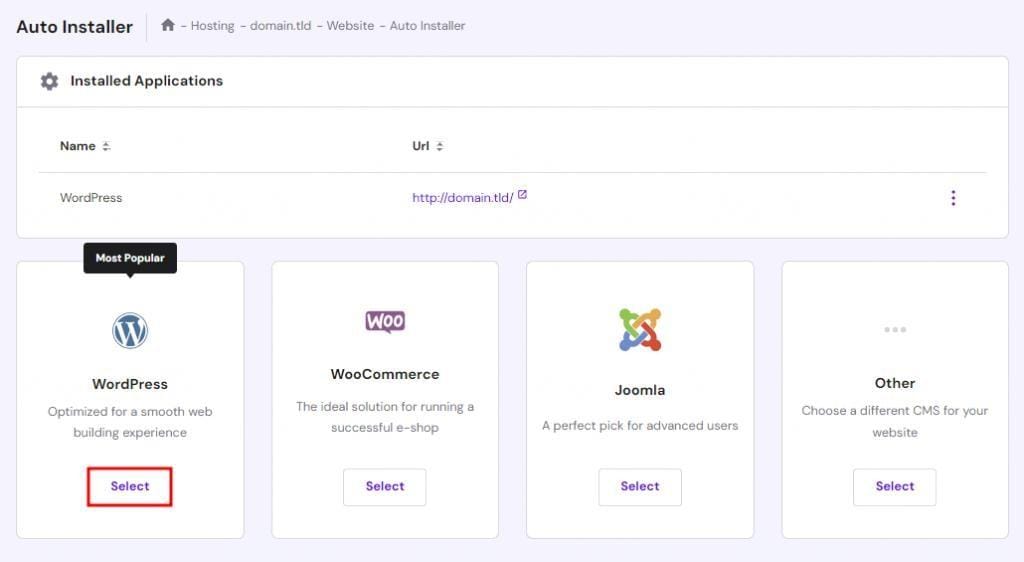
⚡ Step 3: Open Auto Installer
Inside Hostinger dashboard:
- Click “Website”
- Select your domain
- Open “Auto Installer”
🖥️ Step 4: Select WordPress
Inside Auto Installer:
- Choose WordPress
- Click Install
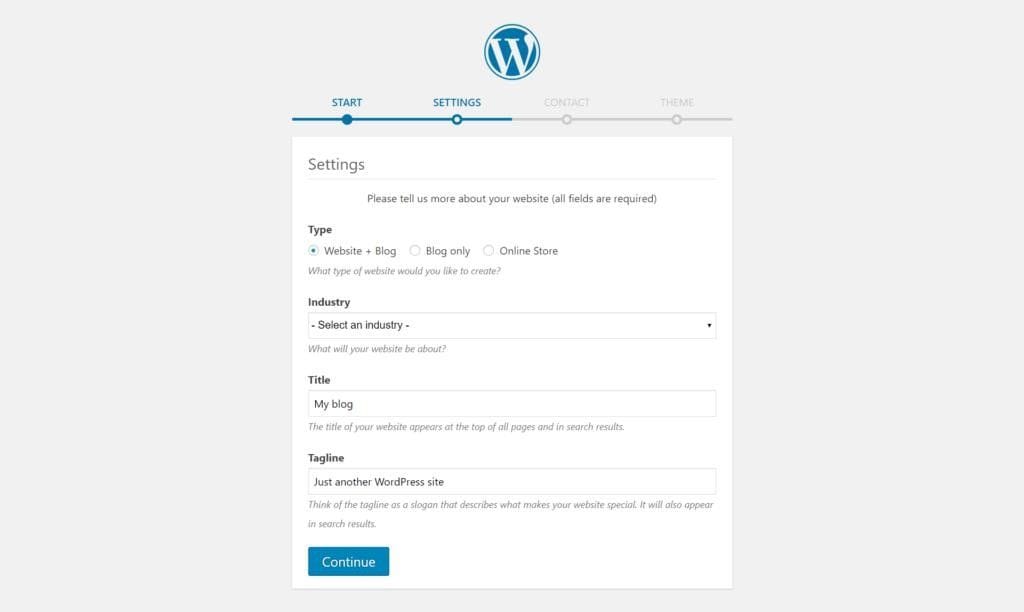
🔑 Step 5: Enter Website Details
You’ll need:
- Website name
- Admin username
- Password
- Email address
👉 Save login details safely.

🚀 Step 6: Install WordPress
Click:
“Install”
Hostinger will automatically:
✅ Install WordPress
✅ Configure database
✅ Set up your website
👉 Usually takes only a few minutes.

🌍 Step 7: Open Your WordPress Dashboard
Your dashboard link will look like:
yourwebsite.com/wp-adminLogin using your admin details.

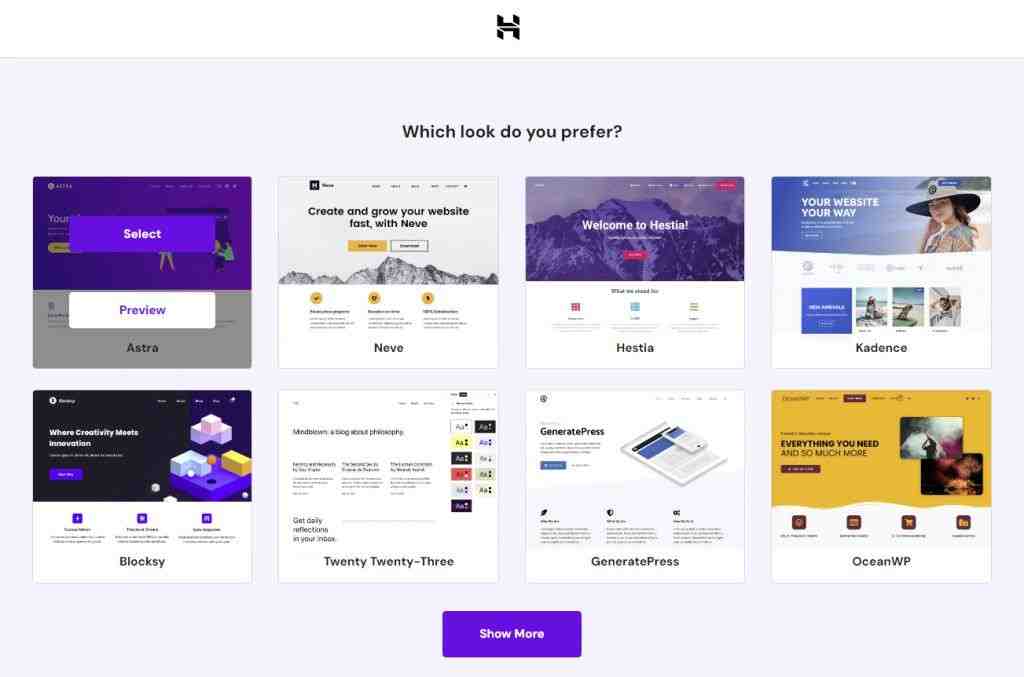
🎨 Step 8: Choose a WordPress Theme
Themes control your website design.
Recommended Beginner Themes
- Astra
- Kadence
- GeneratePress
🔌 Step 9: Install Essential Plugins
Plugins add functionality to your website.
Recommended Plugins
SEO
- Rank Math SEO
Security
- Wordfence
Speed
- LiteSpeed Cache
Page Builder
- Elementor
📈 Step 10: Configure Basic Settings
Go to:
Settings → General
Update:
- Site title
- Tagline
- Timezone
🔍 Step 11: Optimize SEO Settings
SEO helps your website rank on Google.
Basic SEO Tips
✅ Use proper headings
✅ Add keywords naturally
✅ Optimize images
✅ Internal linking

⚡ Step 12: Improve Website Speed
Fast websites rank better on Google.
Speed Tips
- Use LiteSpeed Cache
- Compress images
- Use lightweight themes
🔐 Step 13: Enable SSL Certificate
Hostinger provides free SSL.
SSL helps:
✅ Security
✅ SEO
✅ User trust
🧠 Common Beginner Mistakes
❌ Using weak passwords
❌ Installing too many plugins
❌ Ignoring SEO
❌ Choosing heavy themes
💡 Why I Recommend Hostinger
Hostinger is great because:
✔ Easy setup
✔ Affordable
✔ Fast servers
✔ Beginner-friendly dashboard
🚀 Start Your Website Today

🏆 Final Verdict
Installing WordPress on Hostinger is very easy, even for complete beginners.
With one-click installation and beginner-friendly tools, you can launch your website quickly.
👉 Recommended for:
- Bloggers
- Students
- Freelancers
- Affiliate marketers
❓ FAQs
Is WordPress free on Hostinger?
Yes, WordPress itself is free.
Does Hostinger support WordPress?
Yes, Hostinger is optimized for WordPress.
Do I need coding skills?
No, installation is beginner-friendly.
How long does installation take?
Usually only a few minutes.